 How to Fit a Mortice Lock Like a Pro: DIY Expert Guide

Fitting a mortice lock is no small feat, and doing it like a pro takes more than just enthusiasm. It’s about precision, understanding the right tools, and applying technique that only comes with experience—or guidance from those who’ve been there. How to Fit a Mortice Lock Like a Pro is your essential guidebook through this diy task.
You’ll learn how to pick out the perfect mortice lock for your door, handle spindle holes with care and ensure your new lock not only fits snugly but also enhances home security. From drilling at the correct depth to choosing stylish stainless steel door handles that complement your interior doors, we cover all bases so you can tackle this project confidently.
Stick around if you’re ready to transform that daunting pile of hardware into seamless parts of your daily routine—your well-secured door awaits!
Choosing the Right Mortice Lock for Your Home
Getting your door thickness right is step one. It dictates which mortice lock you’ll pick.
Mortice locks are not a one-size-fits-all affair, so measure up first.
Different doors need different mortice sash locks or deadlocks – choose wisely.
Understanding Lever Mortice Locks
Lever mortice locks offer that extra layer of security you’re after. More levers mean more complexity and better defence against break-ins. They come with various lever counts – typically from two to five – but remember, higher counts usually translate into stronger security for your peace of mind.
A solid lever mortice lock becomes part of the door’s anatomy; it lives within the material itself. To ensure this seamless integration, knowing your door’s makeup is key because each type brings its own quirks when fitting a new lock body in place.
Measuring for a New Mortice Lock
The rule here? Precision leads to perfection when measuring the existing door lock space or prepping for a fresh fit. An ill-measured mortice can be an open invitation to trouble, so grab that tape measure and get detailed dimensions down before heading out shopping or adding items to your shopping cart.
This isn’t just about height and width; depth matters too since it influences how snugly that lock sits inside its wooden home. So think beyond surface level: delve deep.
Fitting Tips:
- Pick based on purpose: Bathroom bins might need privacy latches whereas front doors demand heavy-duty sash locks.
- Note materials used: Stainless steel stands strong against wear while brass has timeless appeal.
- Careful with antiques: Vintage doors may require specialised locksmith prices due to unique fittings needed.
The Installation Process of Mortice Locks
Lock installation, like any home improvement project, demands precision.
Preparing Your Door for a Mortice Lock
Your door’s about to get an upgrade. To start, remove your old lock and measure up. You’re aiming for a snug fit here—no room for wiggles. Take into account the thickness of your door and let that guide you in choosing between sash locks and deadlocks; both work well but they’ve got their own quirks.
Avoiding splinters is key when marking out where you’ll drill holes on the door stile. Mark it clearly; this isn’t just any DIY task, accuracy matters. Eye protection? Non-negotiable because those wood chips fly fast when you’re getting down to business with power tools.
Fitting the Mortice Lock Body
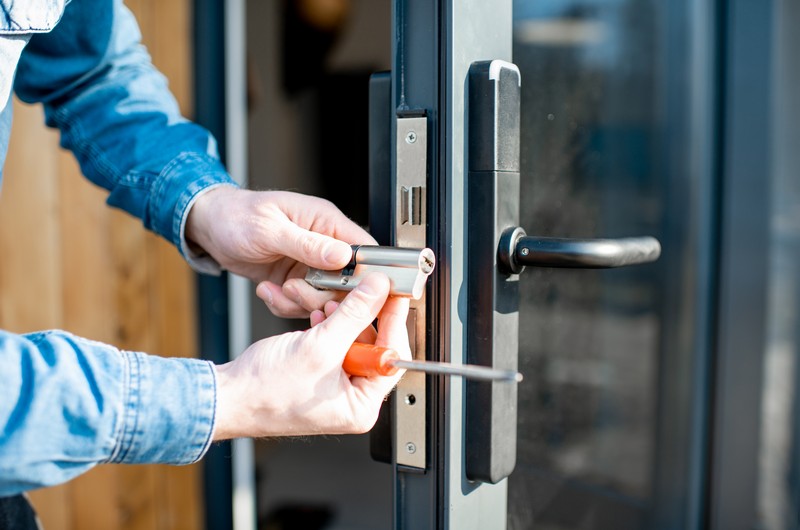
Got all your marks lined up? Great. Now drill through at the correct depth—and keep it straight or say hello to lopsided locks (not what we want). With holes drilled, chisel out space so that mortice pocket hugs your lock body tight enough without needing to force it in—that’s asking for trouble later on.
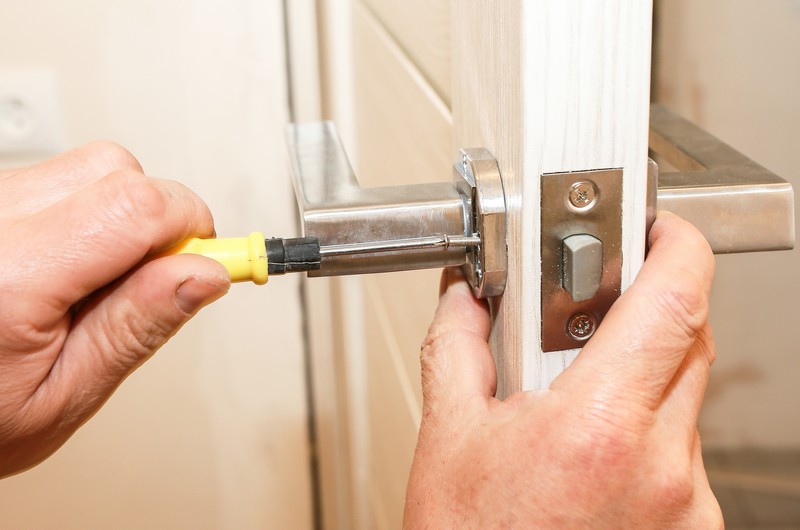
The lock fitted means aligning everything right—the faceplate flush against closing face is non-negotiable here folks. Then screw it secure: not too tight though or metal will warp under pressure over time. Test with handle spindle turning smooth as butter before moving onto securing striker plate neatly into place—it’s all about ensuring proper operation from day one.
Essential Tools and Hardware for Installing a Mortice Lock
You’ll need the right gear to fit that mortice lock.
Selecting the Correct Drill Bit
Pick your drill bit like it’s your sword. Size matters here.
Your drill bit should match the striker plate width perfectly. A snug fit means no wiggle room for errors.
A depth guide is not just handy, it’s essential. You want those holes at the correct depth, every time.
Fitting The Lock Body Just Right
The lock body sits in its new home with precision.
Cut out a pocket that’s tailor-made for your mortice sash or deadlock type. Think Cinderella’s slipper but for locks.
Securely screw it in place; make sure there’s no movement once fitted. Your door isn’t going anywhere now.
Making Room For The Handle Spindle And Key Plates
Measure twice so you only have to cut once when drilling spindle and key hole plates.
No guesswork here – use templates if available because accuracy equals functionality plus style.
Gathering Everything Else You’ll Need
- Eye protection – always look after number one.
- Strike plate – this little piece reinforces security big time.
- Handle spindle – connects handle to mechanism; crucial yet understated.
- Key Plate – It holds everything together, literally.
- Screws of various sizes – You can never have too many.
Finishing Touches to Enhance Door Functionality and Aesthetics
After installing your mortice lock, it’s time to focus on the final touches that will enhance both the functionality and aesthetics of your door.
Choosing Complementary Door Handle Packs
When selecting door handle packs, it’s important to choose ones that complement the style of your home. The door handle is like a handshake for your home, so consider options like stainless steel for a modern look or brass for a classic touch. Look for packs that include all the necessary components, such as handles, spindle, and screws, to ensure a hassle-free installation. Remember, it’s not just about appearance; the handles should also feel comfortable and ergonomic.
Fitting Key Hole Covers with Precision
Once you’ve drilled the necessary holes for your mortice lock, it’s essential to cover them with key hole covers. These covers not only provide a neat and tidy appearance but also protect the edges from wear and tear. Make sure the covers fit securely around the key hole, without any gaps or movement. This small detail can make a significant difference in the overall finish of your door.
Adding Finger Plates for Protection and Polish
Doors are often touched countless times, which can lead to smudges and dirt. To protect your door and add a touch of sophistication, consider adding finger plates. These plates act as guards, shielding the paintwork from fingerprints and other marks. They can be easily fixed above or below your new mortice lock. Choose finger plates that complement the design of your other door fittings, ensuring consistency throughout your home.
Now, take a step back and admire how these finishing touches work together harmoniously, enhancing both the functionality and aesthetics of your door.
Maintaining Your Mortice Locks for Longevity
Learn how to care for and maintain your mortice locks to ensure they remain functional and secure over time.
Regular Cleaning: A Must-Do
Dirt can jam the lock body, making it stiff or unresponsive. Wipe down your mortice sash lock regularly to prevent this. Use mild soap and water on a cloth for cleaning; harsh chemicals might damage the finish or internal mechanisms. Dry thoroughly afterwards.
Paying attention to key holes also prevents blockages that could impair use. An air duster works well here, blasting away accumulated dust without invasive poking around with tools that could cause harm to delicate parts within the lock mechanism itself.
Lubrication is Key
Squeaky handles aren’t just annoying—they signal friction where there shouldn’t be any. Lightly oiling moving parts like latch bolts helps keep actions smooth and extends their life span significantly. Just remember not too much—excess oil attracts dirt. Stick with graphite powder if you’re working on interior doors since it’s less messy than liquid lubricants but equally effective at ensuring proper movement through time spent locked up tight against intruders looking in from outside world troubles waiting beyond threshold our homes provide us shelter from daily grind out there…
Tightening Fittings Regularly Ensures Security
The screws holding everything together loosen over time due to door usage—a quick tighten up keeps things secure though. Check strike plates, handle spindles, even hinge screws once every few months so nothing slips past unnoticed until too late… And don’t forget about those window hardware pieces either; they need love as much as front gates do when it comes keeping peace mind intact knowing family safe inside no matter what happens out in wild blue yonder called ‘outside’ by most folks nowadays anyway.
Rust Prevention: Don’t Let It Corrode Your Peace of Mind
Rust isn’t just unsightly—it weakens metal fast once set in place firmly enough given chance thrive unchecked by preventative measures taken beforehand avoid such fate befalling beloved home fixtures providing sense safety comfort all times day night alike… Stainless steel door handles fare better against corrosion naturally but adding protective coatings available market today further bolsters defence arsenal we wield against forces nature constantly trying break barriers put place protect what dear us deep down heart level existential understanding self-preservation instincts kick whenever feel threatened someway somehow somewhere along line during journey through life ever changing landscape unfolds before eyes each passing moment ticking clock counting seconds minutes hours days weeks months years centuries millennia infinity beyond…
Multiplying Security with Auxiliary Locks
An extra sash window latch? Yes please. Double down on safety; add a secondary locking point above or below your main mortice lock.
Reinforce Your Entry Points
It’s not all about locks though. Ever considered door handle packs that come with integrated privacy functions? Or maybe you fancy adding finger plates around handles for more protection against wear while sprucing up aesthetics?
Never Underestimate Small Upgrades
The devil’s in the details—key hole covers prevent drafts and offer subtle reinforcement.
Aim high when selecting these small yet mighty pieces of hardware; tag them onto your shopping cart during home improvement projects as they complement major security upgrades quite well.
I’ve been there, drilling precise holes, securing those steel protectors into place. It takes patience but pays off massively in peace of mind.
There are ways to beef up what you already have without breaking the bank or starting from scratch – sometimes just upgrading certain aspects can make all the difference.
So next time you view cart full of potential purchases think about this: each piece adds another layer between outside threats and your cosy living room sofa.
Stay safe out there—it starts at your front door.
Conclusion
You’ve got this. How to fit a mortice lock like a pro isn’t just a phrase, it’s your new reality. Remember the steps: choose wisely, measure twice, drill carefully. Ensure every part fits perfectly; from the lock body snug in its place to the spindle hole lined up just right.
Make security not only necessary but stylish with door furniture that reflects your taste. Maintain and upgrade when needed—your home deserves no less. Let these takeaways be tools you carry forever in your DIY kit. Now step back and admire your handiwork—a job well done indeed!


